Quick Steps:
- Open Duplicate Photos Finder
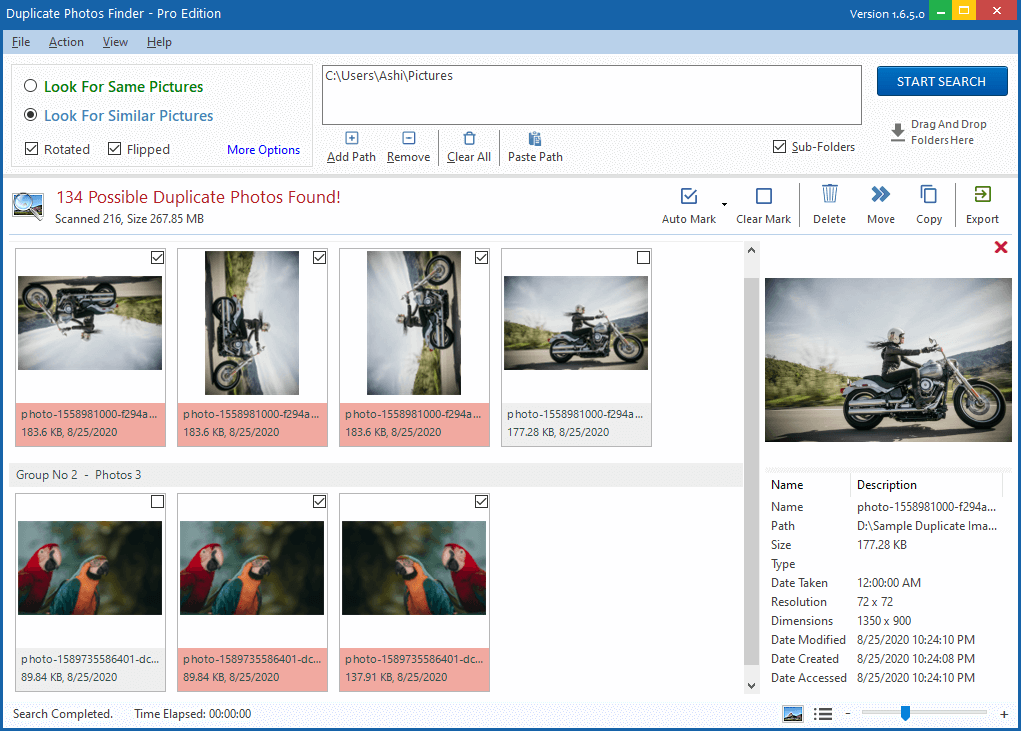
- Add locations where you want to look for duplicate images
- Click "Start Search" button
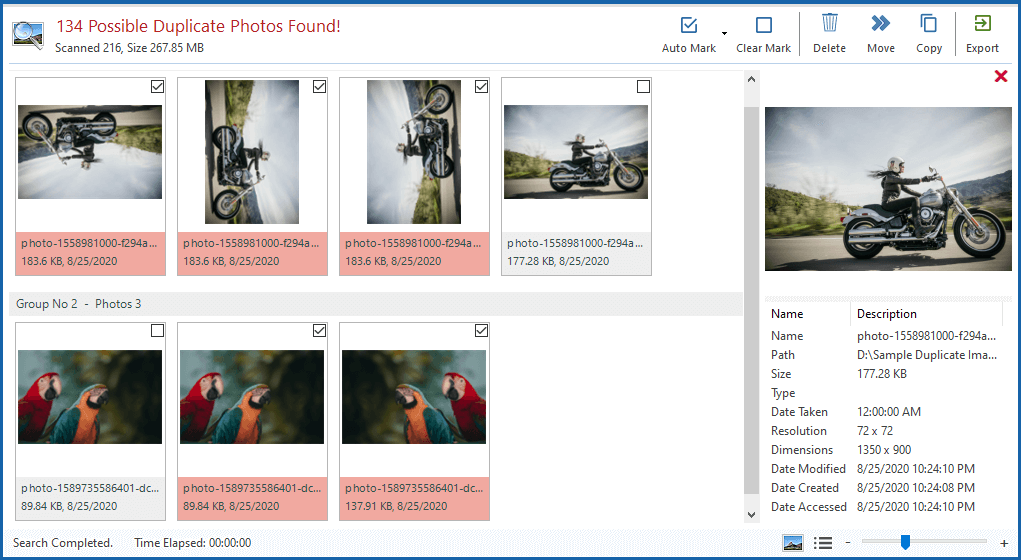
- After few minutes it will list all the similar and duplicate photos
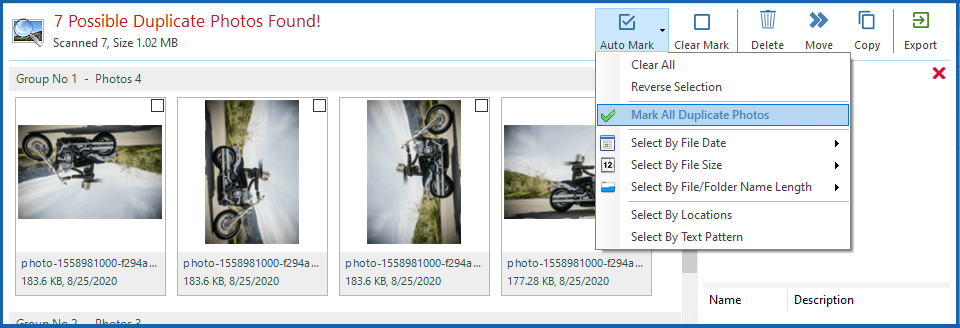
- Select the files you'd like to remove automatically
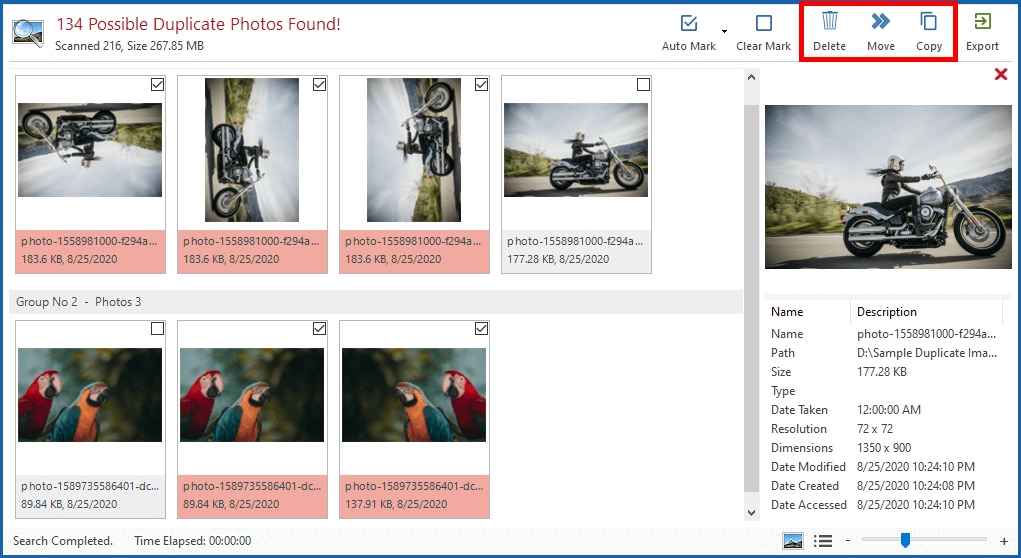
- Click "Delete" button to remove them
For a detailed step-by-step guide, read on below...
How to Find Duplicate Photos
Duplicate Picture Remover is an excellent piece of software that gives you the power to clean up your photos library using an advanced visual comparison technique that matches similar photos side-by-side. It will find and list photos that have been rotated, flipped, retouched, resized, or saved in a different format.
First of all, please make sure that you have downloaded and installed the latest version of Duplicate Photos Finder on your computer.
The installer will take you through the necessary steps that you need to do to complete the installation on your computer. Once the installer completed, Launch Duplicate Photo Cleaner by clicking on the icon.
1. Open Duplicate Photo Finder

2. Add locations where you want to find duplicate photos

Please click on the Add Path button and add as many folders or drives as you like to scan for duplicate photos. You can add multiple locations, including network paths, and you can also use drag and drop folders feature.
3. Click on the "START SEARCH" button to begin the scanning process.

It will now scan the selected folders, and a few minutes later will display a list of similar photos it has found. Click on an item from the list to mark them as selected.
4. After some time... it will list the similar photos

Now you can see a list of the similar images it has found. Make the window full screen to make it easier to know where the images are located, and there's an option to preview files to make sure they are the same photos, this will make the removing process simple and faster.
5. Select the files you'd like to remove automatically.

Now Mark the files manually in each group that you wish to delete, or press the "Mark All Duplicate Photos" to automatically select the oldest files to remove. More selection preferences can be found under the Auto Mark menu
Delete Duplicate Photos and Organize Your Photos Collection
6. Click the "Delete" button to remove duplicate photos

Once you have checked the images to delete, you can delete all of them in one step. Or you can send them to the Recycle bin, or you can move them to another location and, if desired, you can automatically delete empty folders. It is also possible to delete single images one at a time by clicking on the file name and pressing Delete.
Conclusion
Nobody wants their precious disk space to be used for duplicate photos that are not of any use. The guide above walks you through the steps on how you can find such photos and delete them from your pc to reclaim that valuable disk space for storing your other files.
 by Ishtiaq · Updated Jul. 09, 2022